
Your brakes are the unsung heroes of every journey—silently ensuring your safety with every stop. Yet, despite their crucial role, many of us overlook a simple truth: keeping them in check doesn’t always require a trip to the mechanic. With a bit of know-how and a careful eye, you can confidently inspect your brakes right from the comfort of your driveway. In this guide, we’ll walk you through the essential steps to assess the health of your braking system at home, empowering you to catch potential issues early and keep your vehicle running smoothly.
Table of Contents
- Understanding the Basics of Your Vehicle’s Brake System
- Gathering Essential Tools Before You Begin
- Conducting a Visual Inspection of Brake Pads and Rotors
- Checking Brake Fluid Level and Quality
- Testing Brake Performance Safely at Home
- Interpreting Common Brake Wear Signs and When to Seek Help
- Q&A
- The Way Forward
Understanding the Basics of Your Vehicle’s Brake System
At the heart of your vehicle’s stopping power lies a complex yet fascinating system designed to keep you safe on the road. The brake system primarily consists of four main components: brake pads, rotors, calipers, and brake fluid. When you press the brake pedal, hydraulic pressure drives the calipers to squeeze the brake pads against the rotors, creating the friction necessary to slow down or halt the vehicle. Understanding the role each part plays will help you recognize potential issues before they become costly repairs.
When inspecting your brakes, focus on these key indicators of wear and performance:
- Thickness of brake pads: Less than 3 millimeters may require replacement.
- Condition of rotors: Look for grooves, cracks, or scoring on the surface.
- Brake fluid level and color: Should be clear or amber, not dark or cloudy.
- Brake pedal feel: Should be firm, not spongy or excessively soft.
| Component | Normal Condition | Signs of Wear |
|---|---|---|
| Brake Pads | ≥ 3 mm thickness | Thin, cracked, or uneven wear |
| Rotors | Smooth, no deep grooves | Scored, warped or cracked |
| Brake Fluid | Clear to light amber | Dark, cloudy, or low level |
Gathering Essential Tools Before You Begin
Before diving into brake inspection, it’s crucial to assemble the right set of tools to ensure a smooth and effective process. Having everything at your fingertips not only speeds up your work but also minimizes frustration. Start with a reliable jack to lift your car safely off the ground. Pair it with sturdy jack stands to secure the vehicle, preventing any unwanted movement. You’ll also need a lug wrench to remove the wheels, and a flashlight or inspection light to clearly view the brake components beneath the wheel well.
Additionally, consider preparing a few handy items that go beyond the basics. A set of mechanics gloves protects your hands from dirt and sharp edges. A compact mirror on a stick can help you peek into tight spaces, and a digital caliper will come in handy for measuring brake pad thickness with precision. Below is a streamlined checklist of essentials to keep your brake inspection organized and hassle-free.
| Tool | Purpose |
|---|---|
| Jack & Jack Stands | Lift and safely support the vehicle |
| Lug Wrench | Remove wheel nuts |
| Flashlight | Illuminate brake parts |
| Mechanic Gloves | Protect your hands |
| Digital Caliper | Measure pad thickness |
| Inspection Mirror | View hard-to-reach areas |
Conducting a Visual Inspection of Brake Pads and Rotors
Start by safely lifting your vehicle and removing the wheels to get clear access to the brake components. Use a flashlight to closely examine the brake pads for thickness; ideal brake pads have at least 1/4 inch (6.4mm) of material left. Look for uneven wear, deep grooves, or crumbling edges which can indicate the need for replacement. Keep an eye out for any discoloration or cracks on both the pads and rotors as these can signal overheating or structural damage. Remember, brake pads that thin out below 1/8 inch (3.2mm) should be replaced to maintain safe stopping power.
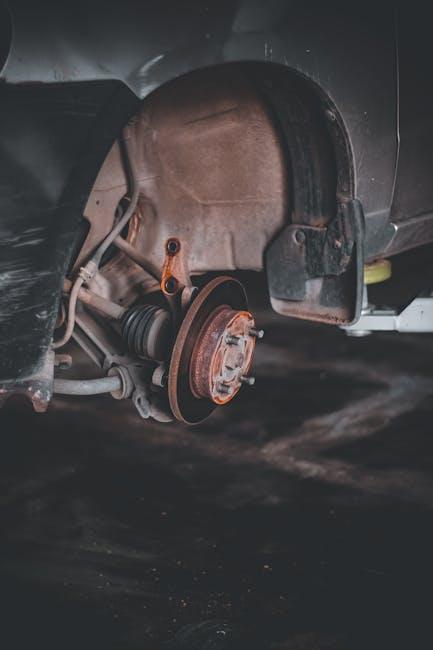
Move on to inspecting the rotors, focusing on the smoothness of their surface. Feel for rough spots or scoring lines that might cause vibrations or noise during braking. Slight surface rust is normal, especially after rain, but heavy corrosion or pitting means the rotors need professional evaluation or resurfacing. If you want a quick reference, use the table below to identify key signs and their basic implications:
| Condition | Appearance | Likely Issue |
|---|---|---|
| Thin Pads | < 1/8 inch thickness | Replace pads immediately |
| Uneven Pads | One side thinner than other | Possible caliper or alignment problem |
| Scored Rotor | Visible grooves or scratches | Rotor resurfacing or replacement |
| Rusty Rotor | Light rust only on surface | Normal, should clear after driving |
| Deep Corrosion | Heavy rust or pitting | Rotor replacement advised |

Checking Brake Fluid Level and Quality
Begin by locating the brake fluid reservoir—usually found near the back of the engine bay on the driver’s side. The reservoir is typically translucent, allowing you to visually check the fluid level without removing the cap. Make sure your vehicle is on a level surface and cold before checking. The fluid should be between the “MIN” and “MAX” markings. If the level is low, this can indicate potential leaks or worn brake pads, both of which require further investigation to keep your braking system safe and effective.
Assessing the quality is just as important as the quantity of brake fluid. Fresh brake fluid is clear or pale yellow, but as it absorbs moisture over time, it darkens and can turn brown or black, which adversely affects braking performance. To test its clarity, use a clean cloth to gently wipe the surface of the fluid after opening the reservoir. If the fluid appears dark or murky, it’s time for a replacement. Below is a quick reference guide to help you evaluate brake fluid condition:
| Fluid Appearance | Condition | Recommended Action |
|---|---|---|
| Clear/Pale Yellow | Good | Check level monthly |
| Dark Yellow/Light Brown | Fair | Plan for fluid change soon |
| Dark Brown/Black | Poor | Immediate fluid replacement |
- Wear gloves when handling brake fluid—it’s corrosive and can harm your skin.
- Avoid contamination: Keep the reservoir cap tightly closed after inspection.
- Use the correct fluid type: Check your vehicle manual for specifications.

Testing Brake Performance Safely at Home
Before taking your vehicle for a spin to test its stopping power, set up a safe, controlled environment to evaluate brake performance without risk. Find a spacious, flat area away from traffic—an empty parking lot works perfectly. Start by gradually accelerating to a moderate speed (around 15-20 mph) and apply the brakes firmly but smoothly. Pay close attention to any unusual sensations such as:
- Vibrations or pulsations in the brake pedal
- Delayed response or sponginess
- Unusual noises like squeaking or grinding
- Pulling to one side when braking
If any of these symptoms appear, it’s a strong indicator that your brake components need professional inspection or replacement. Additionally, use this quick visual reference to compare ideal vs. warning signs during your self-test:
| Test Aspect | Ideal Behavior | Warning Sign |
|---|---|---|
| Brake Pedal Feel | Firm and steady | Soft or spongy |
| Stopping Distance | Consistent, short | Excessive or inconsistent |
| Vehicle Pull | Straight line | Veers left or right |
| Brake Noise | None or faint | Loud screeching or grinding |

Interpreting Common Brake Wear Signs and When to Seek Help
Recognizing the subtle clues your brakes give can save you from costly repairs and dangerous situations. Squeaking or screeching noises often signal worn brake pads, while a consistent grinding sound might indicate metal-on-metal contact, which requires immediate attention. If you notice a spongy or soft brake pedal feel, your brake fluid could be low or air might have entered the system, both of which compromise braking efficiency. Pay attention to the way your car responds; if it pulls to one side when braking or if the pedal vibrates, these are red flags that should not be ignored.
| Symptom | Possible Cause | Urgency |
|---|---|---|
| Squeaking noises | Worn brake pads | Medium |
| Grinding sound | Brake rotor contact | High |
| Soft brake pedal | Low fluid or air in lines | High |
| Car pulls to one side | Uneven brake wear or fluid issues | Medium |
If any of these signs persist, take your vehicle to a professional to ensure your safety on the road. Ignoring mild symptoms can accelerate wear or damage, leading to more extensive repairs. Regular visual inspections paired with listening to what your brake system communicates can greatly extend the lifespan of your brakes and keep your driving experience safe and smooth.
Q&A
Q&A: How to Inspect Your Brakes at Home
Q1: Why should I inspect my brakes at home?
A1: Your brakes are your car’s most critical safety feature. Regular home inspections can help you catch problems before they become costly repairs or dangerous failures, ensuring your vehicle stops reliably when it matters most.
Q2: What tools do I need to inspect my brakes?
A2: You don’t need a full mechanic’s toolkit. Basic items like a flashlight, jack, jack stands or ramps, a lug wrench, and gloves will suffice. For a deeper look, a mirror or a brake pad gauge can be helpful.
Q3: How do I safely prepare my car for a brake inspection?
A3: Park on a flat surface, engage the parking brake, and loosen lug nuts before jacking the car up. Always support the vehicle securely with jack stands or ramps before removing any wheels.
Q4: What should I look for on the brake pads?
A4: Brake pads should have at least 3-4 millimeters of friction material remaining. If they look thin, unevenly worn, or have deep grooves, it’s time for a replacement.
Q5: How can I check the brake rotors?
A5: Inspect the rotors for cracks, deep grooves, or discoloration from overheating. A smooth, shiny surface is normal, but rust or heavy scoring indicates a need for resurfacing or replacement.
Q6: What do I do if I hear unusual noises when braking?
A6: Squealing or grinding noises often signal worn brake pads or debris. While some squealing is normal when brakes are cold, persistent sounds deserve closer inspection.
Q7: How can I test the brake fluid at home?
A7: Locate the brake fluid reservoir under the hood and check the level against the markings. The fluid should be clear or slightly amber. Dark or cloudy fluid may need replacing, but fluid changes are best left to professionals.
Q8: Is it normal for brakes to feel different over time?
A8: Slight changes in pedal firmness or responsiveness can occur, but any sudden softness, hardness, or pulsation when braking should be examined immediately.
Q9: When should I call a professional mechanic?
A9: If you notice severe wear, leaking fluid, unusual sounds, or any brake system warnings on your dashboard, it’s best to seek professional help right away. Brakes are not a DIY repair in serious cases.
Q10: How often should I inspect my brakes at home?
A10: Aim to inspect your brakes every 6 months or every 6,000 miles. Regular checks keep you ahead of wear and tear, preserving your safety and your budget.
By following these steps, you can confidently keep an eye on your brake health, ensuring each stop is safe and sound — all from the comfort of your driveway.
The Way Forward
Inspecting your brakes at home is like giving your car a little check-up from the heart. With a bit of time, attention, and the right know-how, you can ensure your vehicle stops safely when it matters most. Remember, while DIY brake inspections are empowering and practical, they’re just one part of keeping your ride road-ready. When in doubt, don’t hesitate to consult a professional—because your safety, and that of others, is always the ultimate destination. Keep those brakes in top shape, and drive with confidence.